
Fiber Cement Siding Installation Guide for Homeowners
- Andreyan Solanoy
- Feb 4
- 9 min read


Fiber cement siding installation works by attaching durable cement based boards to a home’s exterior in a specific order that protects against moisture, weather, and long term damage. The process starts with preparing the wall surface, adding a weather resistant barrier, and installing flashing to keep water out.
From there, installers secure a starter strip, fasten fiber cement boards row by row with proper spacing, seal joints, and finish with trim and paint to create a clean, long lasting exterior.
Homeowners searching for this guide usually want to know how the installation actually happens, not just why fiber cement siding is popular. That is exactly what we cover here.
We break down each step in plain language so you can understand what goes into a proper installation, what to expect during the project, and why correct installation matters just as much as the material itself.
By the end of this guide, you will know how fiber cement siding is installed, what mistakes to avoid, and how the right process protects your home for decades.
Why Homeowners Choose Fiber Cement Siding Installation
Homeowners choose fiber cement siding because it offers long term protection without the constant maintenance that other materials require. It is built to handle tough weather, resist moisture damage, and maintain its appearance year after year.
For many homeowners, this answers a common concern like can my siding handle New Jersey storms? where strong winds, heavy rain, and winter conditions are part of everyday life.
One of the biggest advantages is durability. Fiber cement siding does not rot, warp, or attract termites. It holds up well against rain, snow, wind, and heat, making it a reliable option for homes exposed to changing climates.
Safety is another reason homeowners feel confident with this siding choice. Fiber cement is fire resistant, which adds an extra layer of protection compared to materials like wood or vinyl and supports the long term siding repair benefits of fewer damage related issues.
Appearance also plays a major role. Fiber cement siding comes in a wide range of styles that can match traditional or modern homes. It delivers the look of wood without the frequent repainting and repairs.
From a value standpoint, proper fiber cement siding installation helps protect the structure of the home while improving curb appeal. That combination makes it a smart investment for homeowners who want both performance and lasting visual appeal.
Types of Fiber Cement Siding Homeowners Can Choose
Fiber cement siding comes in a few main styles, and each one installs a little differently. Choosing the right type depends on how you want your home to look and how much maintenance you want long term.
Lap Siding
Lap siding is the most common option homeowners choose. These horizontal boards overlap slightly as they go up the wall. This overlap helps shed water and creates a clean, classic look.
Installation starts at the bottom of the wall and moves upward, making proper spacing and level placement critical. This style works well for traditional and modern homes alike.
Panel or Vertical Siding
Panel siding uses large vertical sheets instead of individual planks. Installers secure the panels directly to the wall framing, then cover seams with vertical battens or trim.
This option creates a more modern or farmhouse style appearance. Because the panels are larger, accurate measuring and fastening are especially important to avoid visible alignment issues.
Shingle and Shake Siding
Shingle style fiber cement siding mimics the look of cedar shakes. It is often used on gables, dormers, or accent walls rather than the entire home. Installation takes more time because each piece must line up evenly. The result is added texture and visual interest without the maintenance of real wood.
Choosing the right style before installation begins helps ensure the siding performs well, looks balanced, and fits the home’s overall design.
Tools and Materials Needed for Installation
Having the right tools and materials ready before work starts makes the installation process smoother, safer, and more accurate. This also helps homeowners understand what goes into a proper job and why professional installers come prepared.
Tools You Will Need
Measuring tape for accurate layout and spacing
Level and chalk line to keep boards straight and even
Circular saw with a fiber cement blade for clean cuts
Shears or score and snap tools for dust controlled cutting
Hammer or pneumatic nail gun for secure fastening
Caulking gun for sealing joints and trim areas
Safety goggles to protect your eyes
Dust mask or respirator to reduce dust exposure
Work gloves for safe handling of heavy boards
Materials Required
Fiber cement siding boards or panels
Starter strip to support the first row of siding
Galvanized or stainless steel nails approved for exterior use
Weather resistant barrier to protect the wall from moisture
Flashing for windows, doors, and horizontal joints
Exterior grade caulk for sealing gaps
Trim boards for corners, edges, and transitions
Paint or factory finished siding depending on the product choice
Having these tools and materials ready helps prevent delays and reduces mistakes during installation. It also shows why fiber cement siding installation is more than just attaching boards to a wall.
Planning and Pre Installation Preparation
Proper planning is what separates a siding job that lasts decades from one that causes problems within a few years. Fiber cement siding is durable, but it still relies on careful preparation to perform the way it should.
Inspect and Prepare the Wall Surface
Before installation begins, the existing exterior must be inspected. Old siding, loose materials, or damaged areas should be removed.
The wall surface underneath needs to be solid, flat, and dry. Any rot, mold, or structural damage should be repaired first. Installing fiber cement siding over a weak surface can lead to uneven boards and long term moisture issues.
Install a Weather Resistant Barrier
A weather resistant barrier is essential. This layer helps stop water from reaching the wall structure behind the siding. It also allows moisture inside the wall to escape. Skipping this step is one of the most common reasons siding fails early.
The barrier should be installed evenly and sealed properly around seams, windows, and doors. This step plays a major role in protecting the home from leaks and hidden damage.
Add Flashing Around Openings and Transitions
Flashing directs water away from vulnerable areas. It should be installed above windows, doors, and horizontal joints before siding boards are attached. Flashing works together with the weather barrier to prevent water from getting trapped behind the siding.
Taking time during this preparation stage helps the installation move faster and reduces mistakes later. Once the wall is ready and protected, the home is prepared for the actual installation process.
Step by Step Fiber Cement Siding Installation Process

Understanding the order of installation helps homeowners see how each step builds on the next. Below is the standard process professionals follow to ensure the siding performs properly and lasts for years.
Step 1: Measure and Plan the Layout
Measurements are taken across all exterior walls to determine board placement and spacing. Chalk lines are snapped to keep rows straight and consistent. This step helps prevent uneven siding and wasted materials.
Step 2: Install the Starter Strip
A starter strip is installed at the bottom of the wall. This strip supports the first row of siding and sets the correct angle so water can drain away from the home.
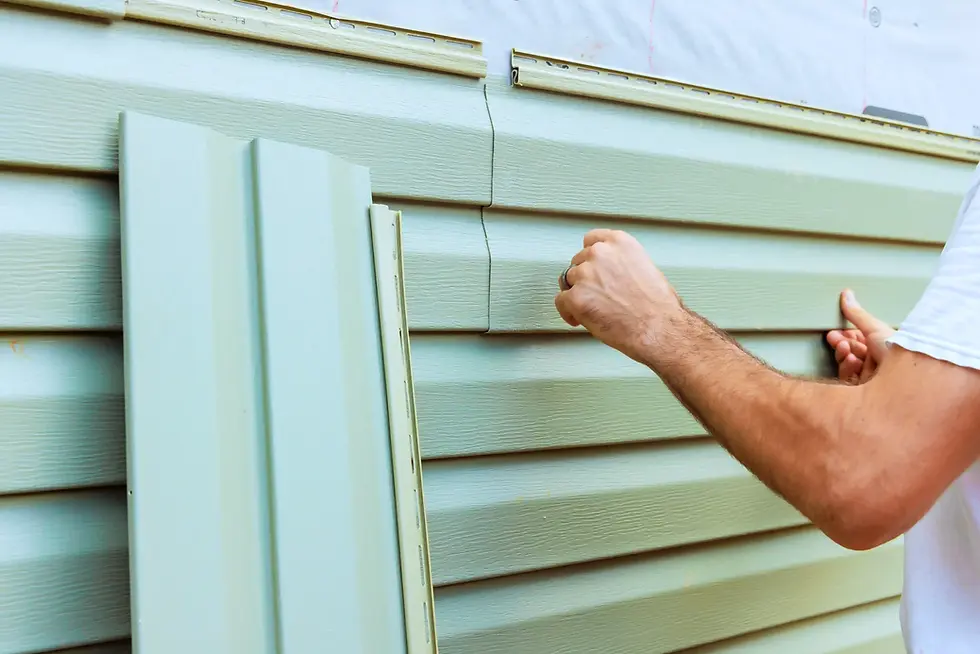
Step 3: Install the First Row of Siding
The first row of fiber cement boards is placed on top of the starter strip. Boards are leveled carefully and fastened according to manufacturer guidelines. Proper alignment here affects every row above it.
Step 4: Fasten the Boards Correctly
Boards are secured using approved nails driven into studs or sheathing at the proper depth. Nails should be flush, not overdriven. Correct fastening prevents cracking and movement over time.
Step 5: Maintain Proper Overlap and Spacing
Each row overlaps the one below it to keep water out. Spacing is maintained at joints and edges to allow for slight expansion and contraction.
Step 6: Cut and Fit Around Openings
Boards are cut to fit around windows, doors, and vents. These areas are sealed and flashed to prevent water from entering behind the siding.
Step 7: Install Trim and Corner Boards
Trim boards are added to corners, edges, and transitions. These pieces create clean lines and help protect vulnerable areas from moisture.
Step 8: Seal Joints and Finish the Surface
Caulk is applied where needed, especially around trim and openings. If the siding is not pre finished, it is painted after installation to complete the exterior.
Following these steps ensures fiber cement siding installation is done correctly and protects the home as intended.
Common Fiber Cement Siding Installation Mistakes to Avoid
Mistakes during installation can shorten the life of the siding and lead to water damage. Here are the most common issues homeowners should watch for.
Installing siding over damaged or uneven wall surfaces
Skipping the weather resistant barrier
Overdriving nails or placing them in the wrong location
Not fastening boards into studs when required
Ignoring spacing and expansion gaps
Poor flashing around windows, doors, and joints
Sealing areas that should remain open for drainage
Cutting boards without proper dust control
Rushing the job and skipping final inspections
Avoiding these mistakes helps ensure fiber cement siding performs as intended and protects the home long term.
Cost Guide for Fiber Cement Siding Installation (January 2026)
When planning a fiber cement siding installation, one of the most common questions is “How much will this actually cost?” According to the most recent Homewyse cost data from January 2026, fiber cement siding installation typically runs between $8.94 and $14.71 per square foot.
This range includes materials, basic professional labor, job supplies, equipment use, and debris disposal for a standard installation under normal site conditions.
To help you estimate what your project may cost, we’ve broken down average pricing based on a 120 square foot example, showing what homeowners can expect to pay from start to finish.
Your actual costs may vary depending on location, job complexity, and any additional services like removal of old siding or custom trim work, but this gives you a solid benchmark to plan from.
Average Cost Overview
Cost Type | Low Estimate | High Estimate |
Average Cost per Square Foot | $8.94 | $14.71 |
Total Cost for 120 Sq Ft | $1,073 | $1,765 |
Detailed Cost Breakdown (120 Square Feet)
Item | Quantity | Low Cost | High Cost |
Fiber Cement Siding Materials | 129 sq ft | $554 | $768 |
Installation Labor (Basic) | 7.2 hours | $382 | $812 |
Installation Job Supplies | 129 sq ft | $55 | $62 |
Equipment Allowance | 1 job | $82 | $123 |
Optional Siding Removal | 1.2 hours | $65 | $139 |
Debris Disposal | — | $115 | $131 |
Total Installed Cost | 120 sq ft | $1,073 | $1,765 |
What This Pricing Includes
Professional installation under normal conditions
Materials and supplies available at major home improvement retailers
Equipment setup, site protection, and cleanup
Delivery of materials and disposal of debris
What This Pricing Does Not Include
Permit or inspection fees
Sales tax on materials
Structural repairs or code upgrades
General contractor supervision (add 13% to 22% if applicable)
This table gives homeowners a realistic picture of what fiber cement siding installation costs in 2026, making it easier to plan and compare quotes.
DIY vs Professional Fiber Cement Siding Installation
Fiber cement siding installation requires precision, planning, and real experience. While some homeowners explore a do-it-yourself approach, this type of exterior work often involves more than basic tools and materials.
When DIY Installation May Be Considered
DIY installation may work for homeowners with hands-on experience in exterior construction. This includes knowing how to prepare wall surfaces, install moisture barriers, apply flashing, and fasten siding correctly. Safe handling of heavy boards and proper dust control during cutting are also essential.
Even with experience, DIY projects can take more time and leave little margin for error. Small mistakes during installation can impact durability, appearance, and long-term performance, which is why many homeowners eventually turn to reliable siding services after early issues appear.
Our Professional Installation Experience
At Hidalgo Brothers Roofing, we approach fiber cement siding installation with a focus on correct preparation, accurate layout, and long-term protection. Our process includes inspecting wall conditions, installing weather resistant barriers, applying flashing where needed, and fastening siding according to manufacturer guidelines.
Our experience with exterior home systems allows us to identify potential issues early and address them properly. This helps homeowners see the long term siding repair benefits of doing the job right the first time, especially when durability and weather resistance are top priorities.
For many homeowners, working with experienced professionals provides confidence that the installation is completed correctly the first time.
Built Right for Long Term Protection
Fiber cement siding installation works best when every step is done with care, from preparation to final fastening. The right process helps protect the home, manage moisture, and extend the life of the exterior.
At Hidalgo Brothers Roofing, our experience with exterior systems guides how we approach siding projects. We focus on proper preparation, accurate installation, and methods that support long-term performance. This approach helps homeowners feel confident that their siding is built to last.
For those planning a fiber cement siding project, understanding the installation process is the first step. When professional insight is needed, contact Hidalgo Brothers Roofing to discuss your options, ask questions, and get clear guidance on the best approach for your home.
Frequently Asked Questions About Fiber Cement Siding Installation
How long does fiber cement siding installation take?
Most residential fiber cement siding projects take several days to a week, depending on the size of the home, siding style, and site conditions. Proper preparation and detailed work are key factors in the timeline.
Can fiber cement siding be installed over existing siding?
In many cases, old siding must be removed to inspect the wall structure and install proper moisture protection. Installing over existing siding is usually not recommended unless conditions meet specific requirements.
Does fiber cement siding require special maintenance?
Fiber cement siding is low maintenance compared to wood. Routine cleaning, checking caulked joints, and repainting when needed help keep it in good condition for many years.
Is professional installation important for fiber cement siding?
Yes. Fiber cement siding is heavy and requires precise fastening, spacing, and moisture control. Professional installation helps ensure the siding performs correctly and meets manufacturer guidelines.
How long does fiber cement siding last?
When installed properly and maintained, fiber cement siding can last 50 years or more, making it a long-term exterior solution for homeowners.


Comments